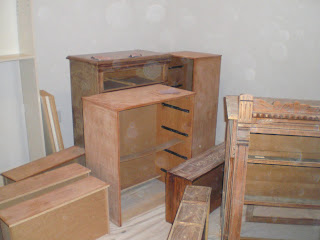
The intro to this project was here, explaining that I am redoing 4 dressers, a mirror frame, and a bookshelf to go in my house.
To get started I wiped everything down really good with a damp rag and then let it dry.
To get started I wiped everything down really good with a damp rag and then let it dry.

Remember this antique beauty, my favorite of finds?


 ...and put on some real dresser feet.
And remember its matching mirror frame?

Well, it had part of the top decorative piece knocked off...

...so I took one of my saws to the other side...
 ...you won't even notice once it's painted.
Then we sanded away, scuffing up all of the surfaces.


I didn't like most of the hardware (drawer pulls), so I took all of them off.
Since I am painting these instead of staining, I just filled the holes with spackle, waited for it to dry, and sanded it down.


2 comments:
this reminds me of my 9th month of pregnancy when I was repainting all my furniture. can't wait to see what you do!
Hi Carmen!
I can't wait to see the finished project!
After my first husband left...I "distressed" our, no, my beautiful bedroom set and made it more beautiful. I painted the entire set hunter green and with a finish of flat ivory. I banged it up with a hammer and sanded the heck out of it with bits of green and raw wood peering through the ivory here and there. I love it!
Keep up the work Carmen. You inspire me!!
Post a Comment